Distilling · Volume 2
Vol 2 — Fermentation: From Raw Ingredients to Distillable Wash
Phase 2 — Distilling deep-dive series. This volume covers everything between choosing your feedstock and loading your still: wash recipes for three common styles, yeast selection, nutrients, sanitation protocol, temperature management, how to read a hydrometer, fermentation timeline, and troubleshooting. Vol 1 established the chemistry; this volume makes it practical.
2.1.1 What Fermentation Produces — and Why It Matters for Distilling
A fermentation is not complete when it reaches terminal gravity. It is complete when it has produced the right kind of wash for the spirit you intend to make. That distinction matters because:
-
Character compounds form during fermentation, not distillation. Esters, fusel alcohols, and congeners are created by yeast metabolism. Distillation concentrates and separates what fermentation made; it does not create new complexity from a characterless wash.
-
A stressed or contaminated fermentation produces compounds that cannot be fully separated in the still. Acetobacter contamination generates acetic acid; insufficient nitrogen causes hydrogen sulfide; excessive heat drives fusel alcohol production. These defects carry over into the distillate.
-
The wash’s ABV determines your still yield. A 6% ABV wash gives roughly 2.4x the spirit volume of a 2.5% ABV wash for the same batch size. Efficient fermentation is directly productive.
2.1.2 Choosing a Feedstock
Three primary feedstock families drive the vast majority of home and craft distilling:
Table 1 — Three primary feedstock families drive the vast majority of home and craft distilling
| Feedstock | Typical ABV potential | Spirit style | Complexity | Cost per gallon wash |
|---|---|---|---|---|
| White sugar (sucrose) | 10–14% | Neutral, vodka-like | Low (fast, simple) | $0.20–0.40 |
| Brown sugar / raw turbinado | 10–13% | Lightly molasses-flavored | Low-medium | $0.30–0.50 |
| Corn meal / cracked corn | 6–10% | Bourbon-style | Medium | $0.50–1.00 |
| All-grain barley malt | 6–9% | Scotch/Irish whiskey style | High | $1.00–2.00 |
| Molasses | 8–12% | Rum | Medium | $0.60–1.20 |
| Apple juice / cider | 6–8% | Apple brandy / calvados | Medium | $1.50–3.00 |
Tier-1 recommendation: Start with a simple sugar wash (see §2.3.1). It ferments reliably in 3–5 days, produces a clean neutral spirit, teaches you the fermentation process without the added complexity of mashing, and is the most forgiving substrate for a first distillation run.
2.1.3 Wash Recipes
2.1.3.1 Simple Sugar Wash (The UJSM Beginner Recipe)
“UJSM” (Uncle Jesse’s Simple Mash) is the standard introductory recipe on home-distilling forums. Clean, fast, reliably fermentable.
Batch size: 5 US gallons (19 L)
Table 2 — 2.3.1 Simple Sugar Wash (The UJSM Beginner Recipe)
| Ingredient | Amount | Notes |
|---|---|---|
| White granulated sugar | 6 lbs (2.7 kg) | Standard table sugar; sucrose |
| Water | To 5 gallons total | Start with 4 gallons warm, top up with cold |
| Yeast nutrient blend | 1 tsp | Fermaid O or equivalent; critical for sugar washes |
| Diammonium phosphate (DAP) | ½ tsp | Additional nitrogen source |
| Citric acid (optional) | ½ tsp | Lowers pH to ~4.5; suppresses bacteria |
| Yeast (EC-1118 or DADY) | 1 sachet (5–7 g) | See §2.4 for selection guide |
Procedure:
- Heat 2 gallons of water to 120°F. Dissolve sugar completely, stirring.
- Add cold water to bring volume to 5 gallons and temperature to 80–85°F.
- Add yeast nutrient, DAP, and citric acid; stir.
- Take an initial gravity reading (target OG: 1.050–1.065).
- Pitch yeast; seal fermenter with airlock.
- Ferment at 65–75°F for 3–7 days until bubbling stops.
- Confirm completion: hydrometer reads stable over two consecutive days (target FG: 0.998–1.005).
Expected yield: 5 gallons at ~10–12% ABV → approximately 0.75–1.0 gallon of 40% spirit after a simple pot-still spirit run.
2.1.3.2 Corn Mash (Bourbon-Style)
A “bourbon-style” mash uses corn as the primary grain. Real bourbon requires 51%+ corn and new charred oak barrels; this recipe produces the fermentable wash that would become bourbon with proper aging. For Tier-1 purposes the spirit run product is typically a white corn whiskey.
Batch size: 5 US gallons (19 L)
Table 3 — 2.3.2 Corn Mash (Bourbon-Style)
| Ingredient | Amount | Notes |
|---|---|---|
| Coarse corn meal (or cracked field corn) | 6 lbs (2.7 kg) | Grocery-store polenta or feed store; finer grinds gelatinize faster |
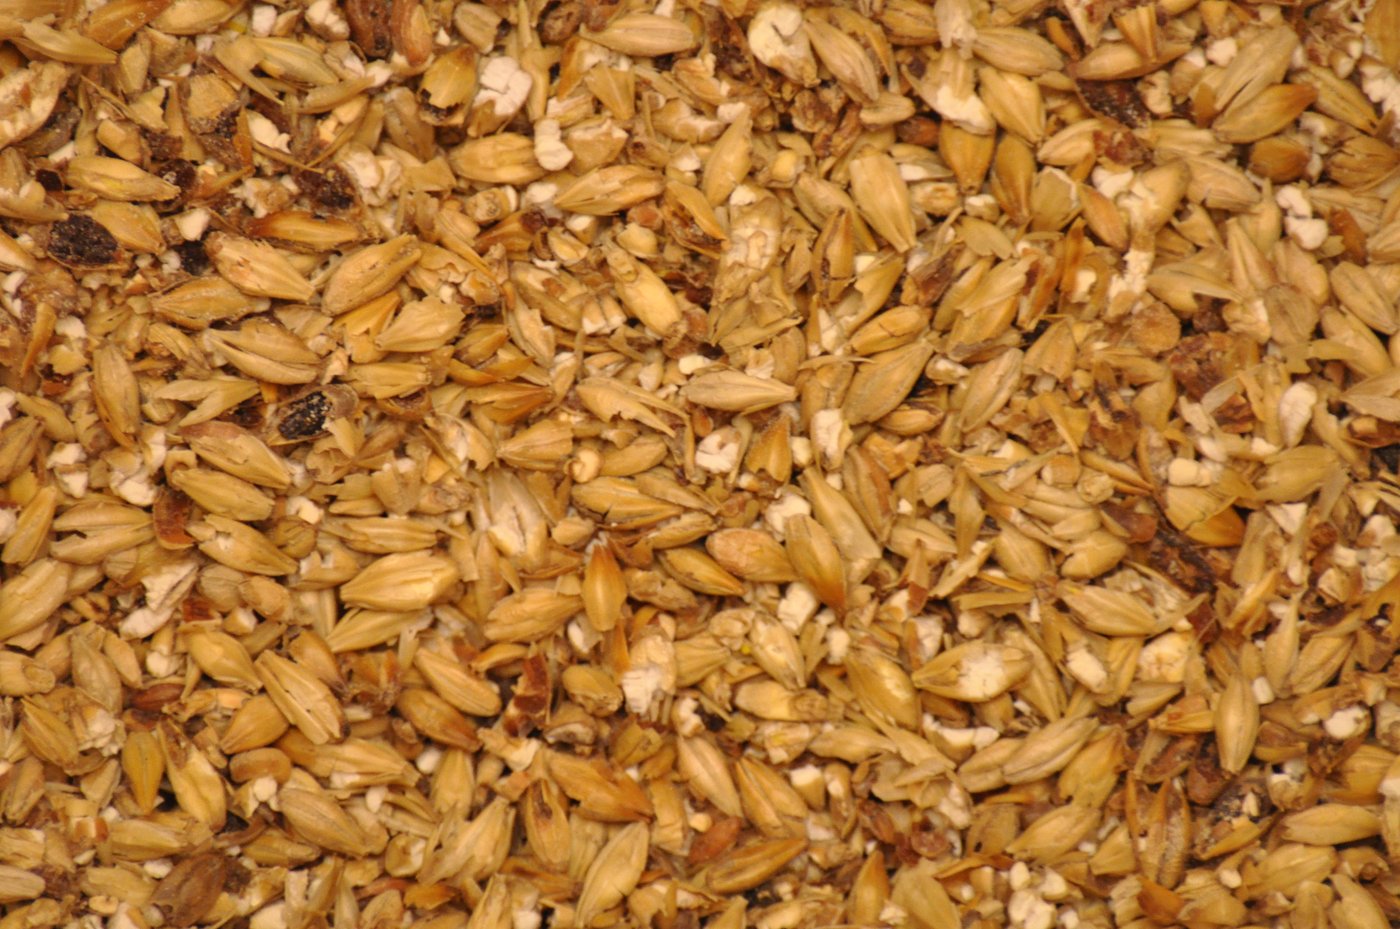
| Malted barley (2-row) | 1 lb (450 g) | Provides amylase enzymes for saccharification |
| Water | ~5 gallons | Hot water for cooking, cold to adjust temp |
| Yeast (distiller’s or bread) | 1 sachet | See §2.4 |
| Yeast nutrient | 1 tsp | Optional but recommended |
Procedure:
- Bring 4 gallons of water to 165°F in a large pot. Slowly stir in corn meal to avoid lumps.
- Hold at 165°F for 45–60 minutes, stirring every 10 minutes. This gelatinizes the corn starch.
- Cool to 148–155°F. Stir in crushed malted barley. Cover and hold for 60–90 minutes (saccharification rest). The mash should become noticeably thinner as amylase enzymes convert starch to sugars.
- Cool to 80°F by placing pot in an ice bath or adding cold water.
- Transfer to fermenter. Take OG reading (target: 1.055–1.070).
- Pitch yeast, seal with airlock.
- Ferment 5–10 days at 65–72°F.
Iodine test for saccharification: A drop of mash on a white plate + a drop of iodine turns dark blue/black if starch remains; stays amber/yellow if conversion is complete. Test before cooling to confirm the mash has fully converted.
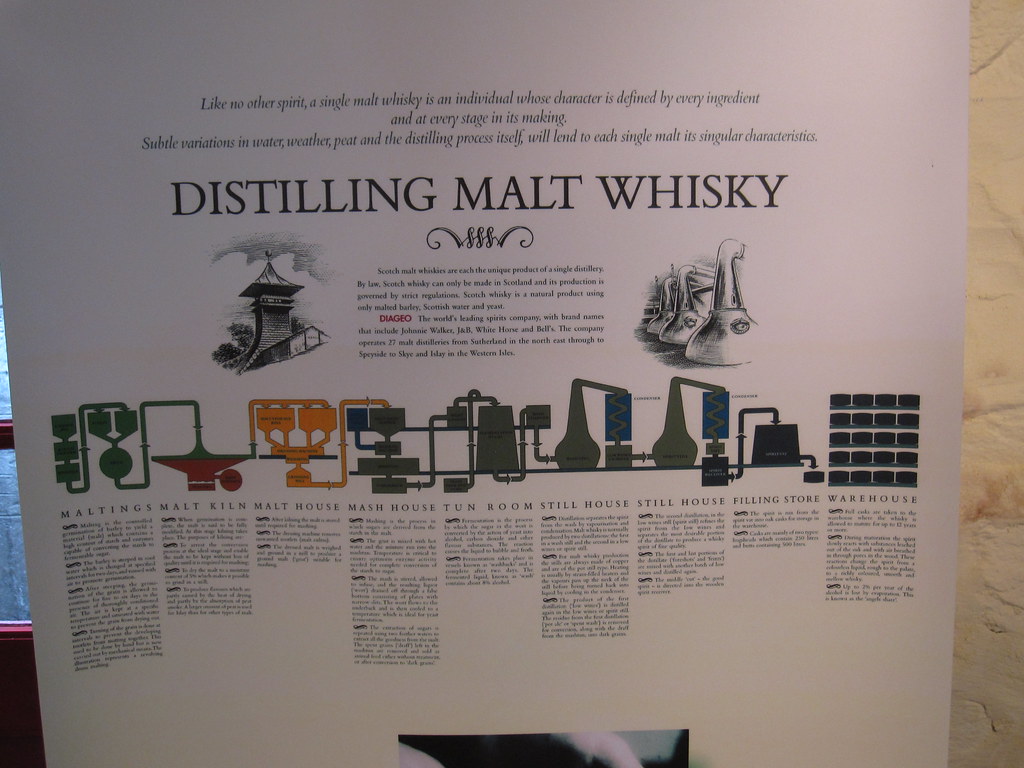
2.1.3.3 All-Grain Single-Malt Wash
A barley-only mash produces a whiskey-character wash closer to Scotch or Irish whiskey. This requires more equipment (a cooler or insulated vessel for mash tun duty, a sparging setup) and more time, but the flavor payoff is significant.
Batch size: 5 US gallons (19 L)
Table 4 — 2.3.3 All-Grain Single-Malt Wash
| Ingredient | Amount | Notes |
|---|---|---|
| Crushed pale barley malt (2-row) | 8 lbs (3.6 kg) | Pre-crushed from homebrew shop, or crush fresh with grain mill |
| Water (mash) | 2.5 gallons | Strike water at 165°F to hit mash temp of 152°F |
| Water (sparge) | 3.5 gallons | 170°F |
| Yeast (whiskey-specific) | 1 sachet | M3 Whiskey, Lallemand Whiskey, or Angel Yeast |
Procedure:
- Heat 2.5 gallons to 165°F. Add to mash tun. Add crushed malt; stir to combine. Temperature should settle at ~152°F. Cover.
- Saccharification rest: hold 152°F for 60 minutes.
- Sparge: slowly pour 170°F water over the grain bed, collecting wort until you have ~6 gallons (you’ll lose volume to grain absorption and boil-off).
- Cool to 75°F. Transfer to fermenter.
- Take OG (target: 1.050–1.065). Pitch yeast.
- Ferment 7–14 days at 65–68°F.
Lautering: All-grain brewing requires separating liquid wort from the spent grain. A DIY lauter tun is a cooler with a false bottom or braided steel hose manifold. This is beyond Tier-1 scope — defer to Vol 4 (Tier-2 bench rig) where all-grain mashing becomes standard practice.
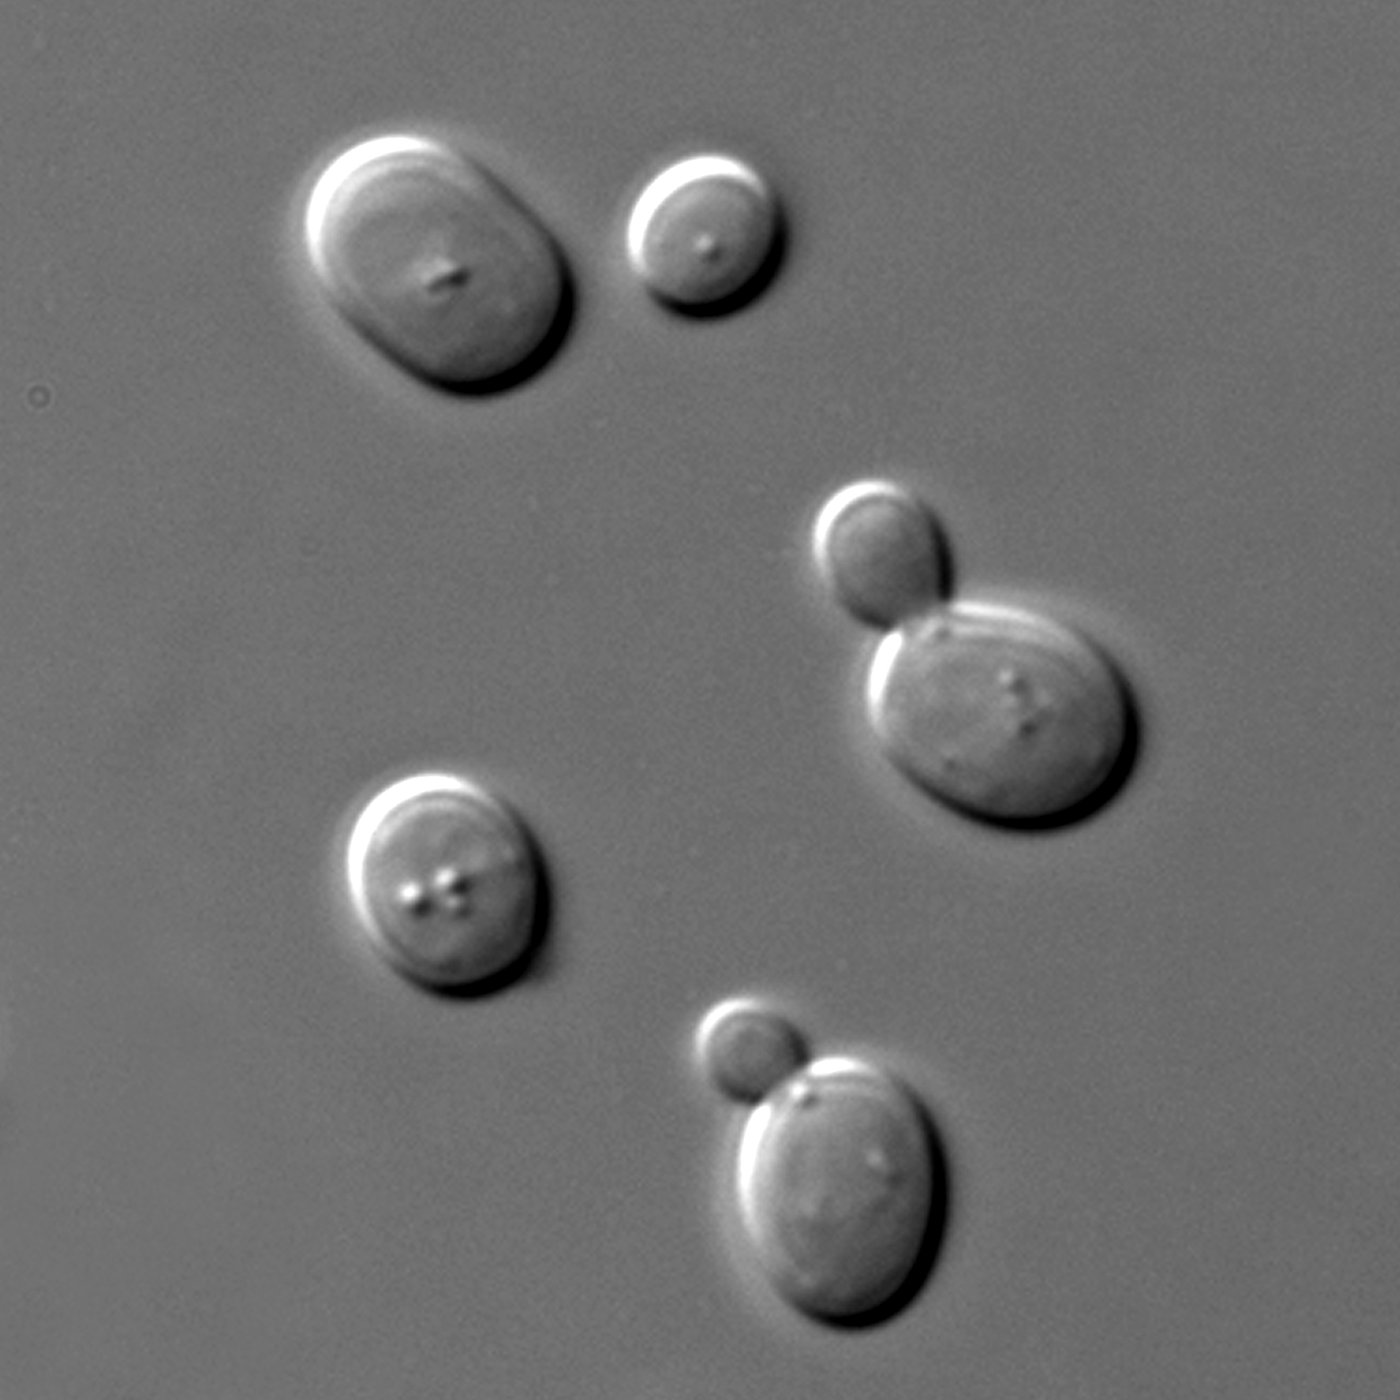
2.1.4 Yeast Selection
Yeast choice determines fermentation speed, alcohol tolerance, congener character, and cost. The table below covers the most practical options for home distilling:
Table 5 — Yeast choice determines fermentation speed, alcohol tolerance, congener character, and cost. The table below covers the most practical options for home distilling
| Yeast | Alcohol tolerance | Optimal temp | Character | Best use | Approx cost |
|---|---|---|---|---|---|
| Lalvin EC-1118 (Champagne) | 18% | 50–86°F | Clean, neutral | Sugar wash, neutral spirit, fruit | $1–2/sachet |
| Lalvin 71B | 14% | 59–86°F | Slight fruit ester | Sugar wash, light fruit | $1–2 |
| Red Star DADY | 15% | 68–95°F | Clean, neutral | Sugar wash, corn mash | $5–8/lb bulk |
| Fleischmann’s Bread Yeast | 10–12% | 70–95°F | Slight bread/earthy | Budget corn mash | $2/jar |
| Still Spirits Turbo 48 | 14% | 64–80°F | Clean | Fast sugar wash | $5–8/sachet |
| Angel Whiskey Yeast | 15% | 68–86°F | Fruity ester, grain character | Corn mash, all-grain | $6–10 |
| Lallemand Whiskey Dry | 14% | 64–75°F | Rich ester, grain | All-grain whiskey | $3–5 |
| White Labs WLP099 | 25% | 68–72°F | Clean | Very high-gravity | $8–12/vial |
For a first run: Use EC-1118 or DADY. Both are inexpensive, widely available, highly reliable, and produce clean fermentations with no character defects. Save the specialty whiskey yeasts for when you have a consistent fermentation process and are ready to explore flavor.
Bread yeast (Fleischmann’s ActiveDry or RapidRise): Works adequately for corn mash and sugar washes if nothing else is available. Produces a slightly earthy, bready note in the distillate. Lower alcohol tolerance means a lower-ABV wash; not suitable for high-gravity recipes.
2.1.5 Nutrients and Water Chemistry
2.1.5.1 Why Sugar Washes Need Nutrients
Pure sucrose in water contains no vitamins, minerals, or nitrogen compounds — the micronutrients yeast require for healthy growth. Without supplementation, sugar washes will:
- Ferment slowly
- Stall at 8–10% ABV (well below potential)
- Produce excessive hydrogen sulfide (rotten-egg smell)
- Generate more fusel alcohols as yeast compensate for nitrogen stress
Standard supplementation for 5 gallons:
- Yeast nutrient blend (Fermaid O, Fermaid K, or generic): 1–2 tsp. Provides FAN (free amino nitrogen), zinc, vitamins B1/B5.
- DAP (diammonium phosphate): ½ tsp additional nitrogen boost; cheap and effective.
- Staggered nutrient addition (SNA): Advanced technique — split the nutrients into two additions (at pitching and at 24 hours) to reduce sulfur production. Useful for cleaner high-gravity fermentations.
Grain mashes are largely self-supplementing: malted grain provides FAN, minerals, and vitamins naturally. Nutrient addition is optional but still beneficial for faster, more complete fermentation.
2.1.5.2 Water Chemistry
Tap water quality varies by location. For most purposes, if your tap water tastes good, it will ferment well. Points to check:
- Chloramine/chlorine: Municipal water treatment uses chloramine (chlorine + ammonia), which can inhibit yeast and produce medicinal off-flavors. Add one crushed Campden tablet per 10 gallons before fermentation to neutralize it instantly; or let water sit uncovered for 24 hours (removes chlorine but not chloramine).
- pH: Target wash pH of 4.0–5.0. Corn mash pH naturally falls in range; sugar washes may benefit from a small addition of citric acid or tartaric acid.
- Mineral content: Not critical for basic fermentation. For advanced flavor development, follow homebrew water-chemistry guidelines.
2.1.6 Sanitation: The Non-Negotiable
Poor sanitation is the single most common cause of failed fermentations. A contaminated wash can produce vinegar (acetobacter), excessive lactic acid (lactobacillus), or off-flavors that carry into the distillate. None of these can be fully removed in the still.
2.1.6.1 The Distinction: Cleaning vs. Sanitizing
- Clean first: remove all physical residue with warm water and an unscented dish soap or PBW (Powdered Brewery Wash). Rinse thoroughly. A sanitizer applied to dirty equipment does not work — organics neutralize sanitizer.
- Sanitize second: kill remaining microorganisms on clean surfaces.
2.1.6.2 Sanitizer Options
Table 6 — 2.6.2 Sanitizer Options
| Sanitizer | Dilution | Contact time | Rinse required | Notes |
|---|---|---|---|---|
| Star San | 1 fl oz per 5 gallons water | 1 minute | No | Most popular; acid-based; foam is harmless |
| Iodophor | ½ fl oz per 5 gallons | 2 minutes | No (if diluted correctly) | Stains porous surfaces; iodine-based |
| Bleach (unscented) | 1 tbsp per gallon | 10 minutes | Yes — rinse thoroughly | Cheap; chlorine residue causes off-flavors if not rinsed |
| Campden tablets | 2 tablets crushed in 1 cup water | Wipe/soak | No | Sulfite-based; good for winery equipment |
Star San is the standard recommendation for beginners: no-rinse, highly effective, leaves no flavor residue, and the foam indicates good coverage. Make a spray bottle of Star San solution and use it on every surface that contacts your wash.
2.1.6.3 What to Sanitize
Every item that contacts the wash after it is cooled must be sanitized:
- Fermentation vessel (carboy, bucket, or HDPE fermenter)
- Lid and airlock
- Hydrometer and sample tube/thief
- Funnel
- Stirring spoon or auto-siphon
- Thermometer
2.1.7 Temperature Management
Temperature is the single variable with the biggest impact on fermentation quality at home scale, and it is largely free to control with basic equipment.
2.1.7.1 Why Temperature Matters
- Too hot (>85°F / 29°C): Yeast stress response produces elevated fusel alcohols (propanol, isoamyl alcohol, isobutanol). The distillate will be noticeably “hot” and harsh even after good cuts. Fermentations at 90°F+ often produce unacceptably fusel-heavy spirit.
- Too cold (<60°F / 15°C): Yeast metabolism slows dramatically. Fermentation may stall mid-run at 5–6% ABV. Turbo and champagne yeasts tolerate 60–65°F; bread yeast should not be pitched below 68°F.
- Optimal range (65–75°F / 18–24°C): Balances fermentation speed with flavor quality. Most distiller’s yeasts are designed for this range.
- Fermentation exotherm: Active fermentation generates heat, raising the wash temperature 2–5°F above ambient. Account for this: if your room is 72°F, your wash may be at 75–77°F during peak fermentation.
2.1.7.2 Temperature Control Methods
Table 7 — 2.7.2 Temperature Control Methods
| Method | Cost | Effectiveness | Notes |
|---|---|---|---|
| Room temperature (basement, interior closet) | $0 | Good if room is 65–72°F | Most practical for beginners |
| Seedling heat mat under fermenter | $15–25 | Good for cold rooms | Raises temp 5–10°F; use with thermostat |
| Inkbird / STC-1000 thermostat + heat mat | $30–50 | Excellent ±1°F | Standard homebrewers’ setup |
| Insulated cooler + frozen water bottles | $0–20 | Good for hot rooms | Swap bottles every 12 hours at peak |
| Aquarium chiller + submersible pump | $80–150 | Excellent | Overkill for Tier-1; consider for Tier-2 |
| Water bath + ice | $0 | Moderate | Labor intensive; works for small batches |
Practical note for Tier-1: A 5-gallon fermentation bucket in an interior room that stays 68–72°F year-round needs no active temperature control. Buy a Inkbird IBS-TH2 wireless thermometer ($15) and place the probe in the wash for the first few fermentations — once you know your room’s behavior, you can skip it.
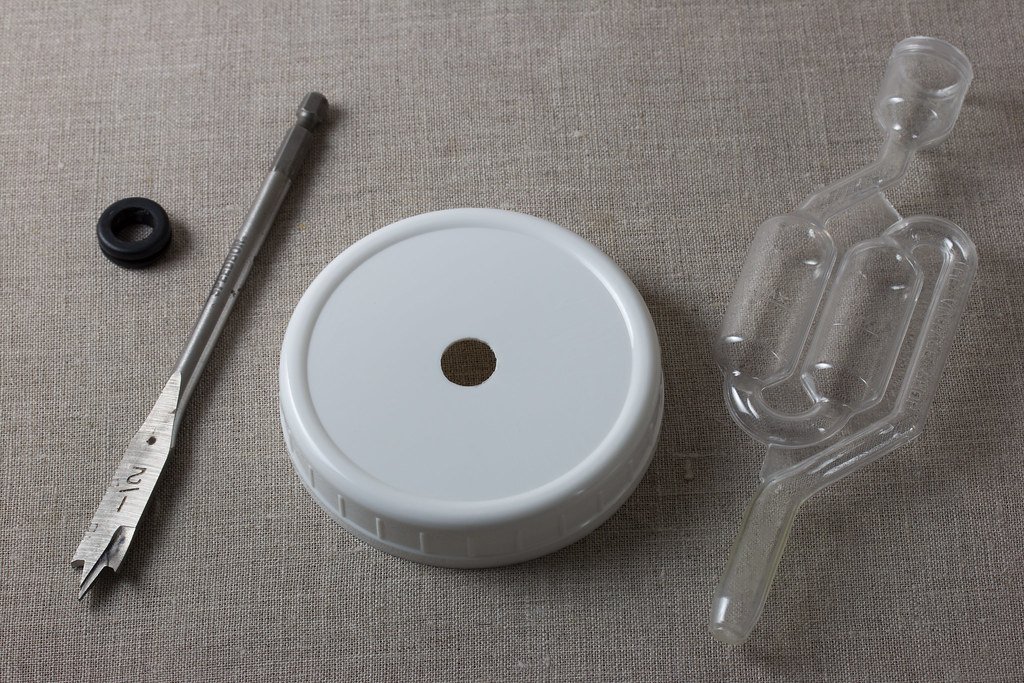
2.1.8 Fermentation Equipment for Tier-1
The full Tier-1 fermentation kit can be assembled for $40–80 from homebrew supply shops or Amazon:
Table 8 — The full Tier-1 fermentation kit can be assembled for $40–80 from homebrew supply shops or Amazon
| Item | Qty | Notes |
|---|---|---|
| 6.5-gallon HDPE food-grade bucket with lid | 1 | Primary fermenter; lid drilled for airlock grommet |
| 3-piece or S-type airlock | 1 | Allows CO₂ out, keeps air/contamination out |
| Auto-siphon (racking cane) + tubing | 1 set | Transfers wash to still without disturbing sediment |
| Hydrometer (0.990–1.130 range) | 1 | Glass test tube or graduated cylinder for reading |
| Stick-on fermometer or instant-read thermometer | 1 | Monitor wash temperature |
| Long-handled plastic spoon or stirring paddle | 1 | Stainless or food-grade nylon |
| Star San (16 fl oz concentrate) | 1 bottle | Lasts ~40+ batches at standard dilution |
Optional but recommended:
- Yeast nutrient (Fermaid O or generic, 4 oz bag)
- pH strips or digital pH meter (4.0–7.0 range)
- Refractometer (faster than hydrometer for checking progress mid-fermentation)
2.1.9 The Fermentation Timeline
2.1.9.1 Phase 1: Lag Phase (Hours 0–12)
Yeast are adapting to their new environment — rehydrating if dry, acclimatizing to temperature and osmotic pressure. No visible CO₂. A healthy lag phase ends within 12 hours of pitching. If you see no activity at 18 hours, check temperature and consider re-pitching.
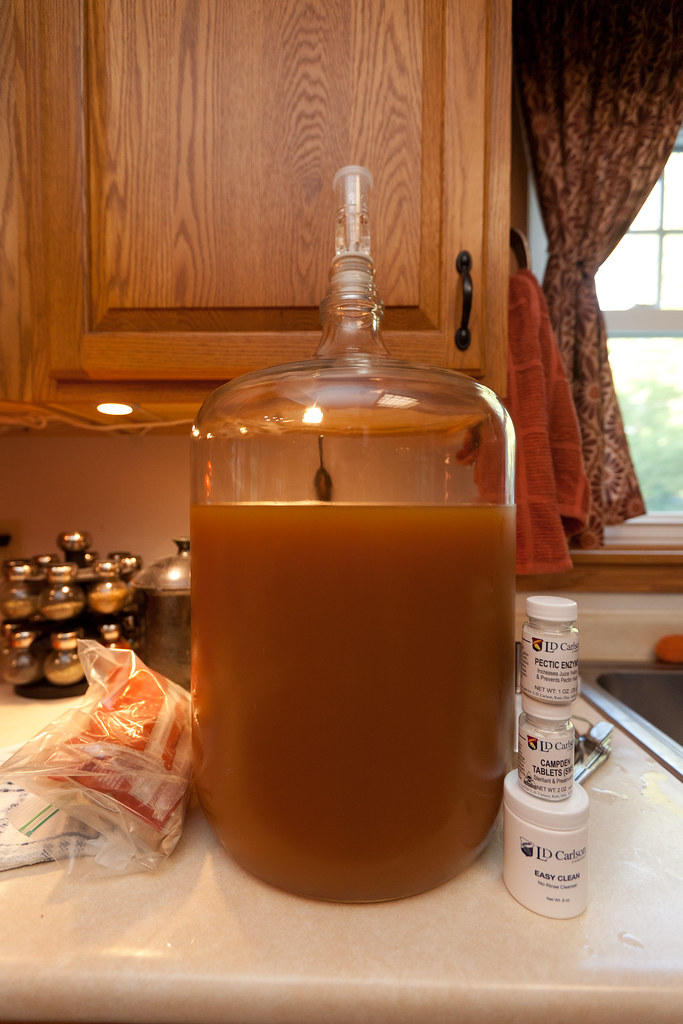
2.1.9.2 Phase 2: Exponential Growth (Days 1–3)
Yeast population doubles every 1–4 hours as long as nutrients, oxygen (from initial mixing), and temperature are favorable. You will see:
- Active bubbling in the airlock (every 15–60 seconds is healthy)
- Foam or krausen layer on top of the wash
- Visible CO₂ streaming up through the liquid
- Temperature rising slightly above ambient (fermentation exotherm)
This is the most visually exciting phase. Do not open the fermenter unnecessarily.
2.1.9.3 Phase 3: Deceleration (Days 3–7)
Yeast population peaks and begins to decline as ethanol accumulates and nutrients deplete. Bubbling slows to once every few minutes or less. The krausen falls. The liquid begins to clarify as yeast flocculate (clump and fall).
2.1.9.4 Phase 4: Terminal Fermentation (Days 5–14)
Fermentation is essentially complete. Bubbling has stopped or is extremely slow (once every 5+ minutes — which may actually be off-gassing, not active fermentation). Yeast have largely settled to the bottom as a compact sediment (lees).
Do not rush this phase. Distilling a wash that has not fully fermented:
- Wastes alcohol still locked in the wash
- Produces more fusel alcohol in the distillate (yeast under stress)
- Can cause pumping/foaming issues if residual CO₂ is high
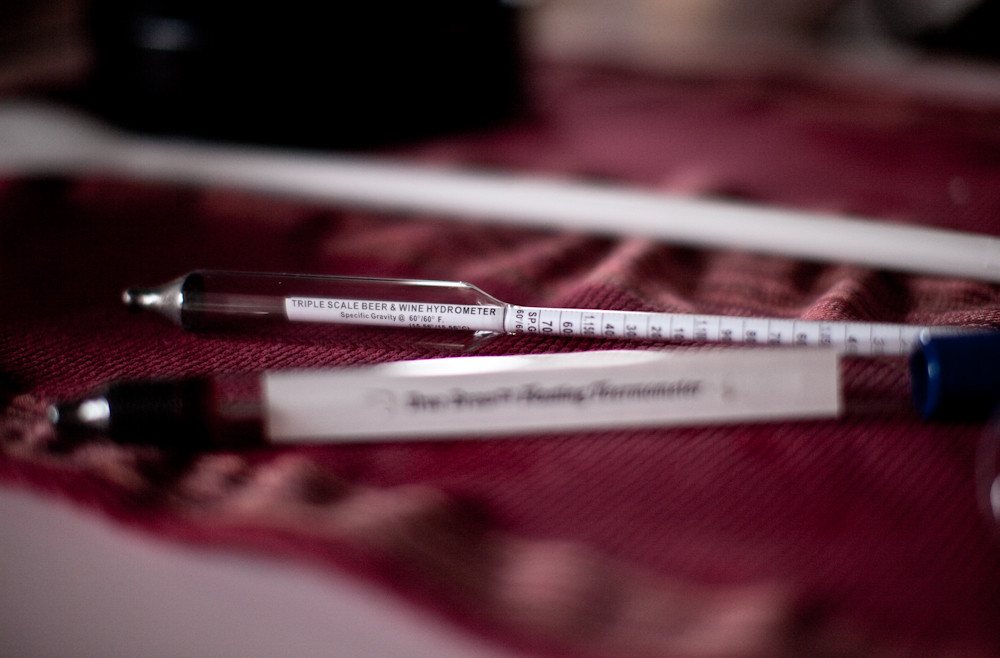
2.1.9.5 Confirming Completion with a Hydrometer
The hydrometer is the definitive tool for confirming fermentation is done. Do not rely solely on airlock activity — airlocks can show CO₂ off-gassing that looks like active fermentation, or can stop bubbling while fermentation continues if the seal is not airtight.
Procedure:
- Sanitize the hydrometer and sample tube/cylinder.
- Draw a sample of wash (~100 ml) from the upper portion of the fermenter.
- Float the hydrometer; read the specific gravity at the bottom of the meniscus.
- Record the reading.
- Repeat in 24–48 hours.
Interpretation:
- Stable reading over two days = done. Final gravity (FG) for a fully fermented sugar wash is typically 0.998–1.005. For corn mash it’s typically 1.005–1.015 (unfermentable dextrins remain in the mash).
- If the reading is falling between measurements, fermentation is still active — wait.
ABV calculation:
ABV (%) = (OG - FG) × 131.25

Example: OG = 1.060, FG = 1.002
ABV = (1.060 - 1.002) × 131.25 = 0.058 × 131.25 = 7.6% ABV
Temperature correction: Hydrometers are calibrated at 60°F (15.5°C). For each 10°F above 60°F, add 0.001 to the reading. Most sample tubes have a temperature correction chart printed on them.
Table 9 — 2.9.1 Confirming Completion with a Hydrometer
| OG | FG (expected) | ABV |
|---|---|---|
| 1.040 | 1.002 | ~5.0% |
| 1.050 | 1.002 | ~6.3% |
| 1.060 | 1.002 | ~7.6% |
| 1.070 | 1.000 | ~9.2% |
| 1.080 | 0.998 | ~10.8% |
| 1.090 | 0.998 | ~12.0% |
2.1.10 Troubleshooting Fermentation
2.1.10.1 Problem: No airlock activity after 24 hours
Likely causes and fixes:
- Lid not sealed: CO₂ is escaping around the lid. Test: press gently on lid, listen for leak. Re-seal. Confirm by hydrometer — if gravity is dropping, fermentation is active.
- Temperature too cold: If wash is below 60°F, yeast are dormant. Warm to 68–72°F.
- Yeast dead or too old: Packet past expiration date or stored improperly. Re-pitch fresh yeast.
- Osmotic stress (high sugar): OG above 1.090 can shock yeast. Rehydrate yeast in 104°F water first; let cool slowly before adding to wash.
- Sanitation chemical residue: Bleach not rinsed, or sanitizer at too high a concentration. Rare with Star San.
2.1.10.2 Problem: Stuck fermentation (activity stopped before reaching expected FG)
Likely causes:
- Nutrient deficiency (especially in sugar washes): Add another ½ tsp yeast nutrient + ¼ tsp DAP. Do not add more than 2 total tsp per 5 gallons — over-nutrients cause off-flavors.
- Temperature crash: Check and correct temperature.
- Yeast poisoned by ethanol: Near tolerance ceiling. Try pitching a more alcohol-tolerant strain (EC-1118 will re-ferment up to 18%).
- pH too low: Check with pH strip; if below 3.8, add a pinch of potassium bicarbonate to raise to 4.0–4.5.
2.1.10.3 Problem: Sulfur (rotten egg, H₂S) smell
Cause: Yeast under nitrogen stress produce H₂S. Almost always means insufficient FAN (free amino nitrogen) in the wash.
Fix: Add yeast nutrient (Fermaid O preferred; lower in DAP and thus lower H₂S risk) at ½ tsp per 5 gallons. Splash the wash briefly (degassing also helps drive off H₂S). In severe cases, add a small pinch of copper scubby (food-safe copper) to the fermenter — copper binds H₂S chemically.
Note: A small amount of H₂S produced during fermentation usually dissipates before distillation. If the smell persists at the end of fermentation, allow an extra 24–48 hours of open-lid rest time (covered with cheesecloth, not sealed) before distilling.
2.1.10.4 Problem: Sour/vinegar smell after fermentation
Cause: Acetobacter contamination (bacteria that oxidize ethanol to acetic acid) or excessive lactic acid bacteria (LAB) growth. Indicates a sanitation failure — typically leaving the airlock to run dry or contaminated equipment.
Fix: This wash is largely unsalvageable for drinking spirit. The acetic acid will carry over into the distillate. If only lightly soured, distilling will produce a usable product with some sharpness; add to the vinegar/cleaning supply or use as starter for future bacterial inoculation if you are interested in sour mashing.
Prevention: Maintain airlock water level; sanitize all equipment; do not open the fermenter unnecessarily.
2.1.10.5 Problem: Wash tastes sweet at expected terminal gravity
Cause: Grain mashes leave unfermentable dextrins. FG of 1.010–1.020 is normal for corn mash; it does not mean fermentation is incomplete.
How to confirm: Perform a force-attenuation test — take a small sample (50 ml), add a tiny pinch of EC-1118 or Beano (amyloglucosidase enzyme), and let sit for 24 hours. If the gravity drops significantly, fermentation was incomplete; if it holds steady, you are at true terminal gravity for your mash.
2.1.11 From Fermented Wash to the Still: Transfer and Preparation
When fermentation is confirmed complete:
- Do not stir the lees. The yeast sediment at the bottom is harmless in the fermenter but can scorch on the still’s heating element if transferred.
- Siphon with an auto-siphon from 4–6 inches above the bottom of the fermenter, leaving the lees behind.
- Optional: clarification rest. For cleaner spirit, cold-crash (chill to 35–40°F overnight) to help yeast and proteins settle before transferring. This is optional for Tier-1.
- Do not filter through paper or fine mesh — you will strip flavor compounds.
- Fill still to ½–¾ capacity maximum. Boiling wash expands and foams; overfilling causes carry-over into the condenser and contaminated distillate.
- Record volume and measured ABV of the wash before loading. This lets you calculate expected distillate volume (approximately 1/5 of wash volume for a single spirit run to 40% ABV).
Carrying wash to the still: Standard 5-gallon food-grade HDPE or stainless steel buckets work well. Have a funnel sanitized and ready. Transfer is a good time to notice the smell of the wash — a healthy fermented sugar wash smells yeasty and slightly sweet; a healthy corn mash smells like bread dough with a sweet corn note. Off-smells at this stage (vinegar, sulfur, medicinal) are last-chance warning signs before you load the still.
2.1.12 Stripping Run vs. Spirit Run: When to Double-Distill
For Tier-1 pot stills running 2–5 gallon batches, there are two approaches:
Single spirit run (recommended for Tier-1):
- Load the fermented wash directly into the still.
- Run at moderate heat; make your heads/hearts/tails cuts.
- Output is your final product at 40–65% ABV.
- Simpler, uses less time and fuel.
- Acceptable quality for small batches.
Stripping run + spirit run (standard professional practice):
- Stripping run: Run the wash fast, collecting everything from foreshots to tails as low wines (~25–35% ABV). No cuts needed; maximize ethanol recovery. The goal is to concentrate the alcohol without worrying about flavor.
- Spirit run: Run the low wines through the still a second time, this time making careful cuts. The double-distilled product is smoother and has better separation of heads and tails from hearts.
The double-distill method is superior in quality but requires more batches to accumulate enough low wines (typically run 3–5 batches as stripping runs, combine, then do a single spirit run). This is the professional workflow and is covered in depth in Vol 4 (Tier-2 bench rig).
Decision rule for Tier-1: Single spirit run. Learn your cuts on a manageable volume before adding the complexity of low-wine management.
2.1.13 Summary: Fermentation Checklist
Before moving to the still, verify:
- Wash fully fermented: hydrometer stable at expected FG for 2 days
- No active CO₂ production (no bubbling; dissolved CO₂ allowed to off-gas)
- No off-smells (vinegar, sulfur, medicinal) that indicate contamination
- Yeast lees settled and wash siphoned clear
- Still loaded to no more than ¾ capacity
- Volume and ABV of wash recorded
If all boxes are checked, proceed to Vol 3 for the step-by-step Tier-1 still setup and first distillation run.
Comments (0)